

Where can you park a Tiny House RV? There are many different ways to answer this question, but the simple answer is that you can park your tiny abode wherever it is legal to park a regular RV. Laws differ regarding RVs in every county, so you’ll need to research your preferred parking location.
Here’s a list with hundreds of Tiny House friendly RV Parks and Communities.
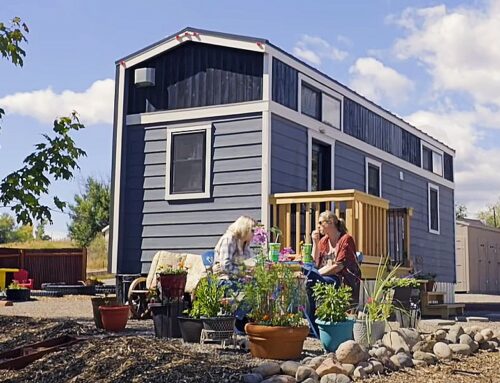
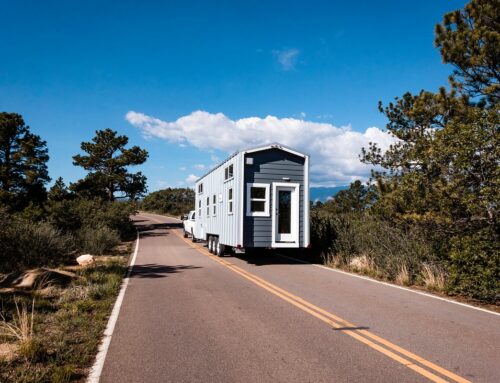
If you plan on traveling with your Tiny House RV, you will have the opportunity to park in campgrounds, National Parks, State Parks, overnight parking lots, rest stops, etc. Always read signage to make sure that “RV overnight parking” is allowed before setting up your Tiny House RV. If you are visiting a friend or family member in a county that allows RV parking, you might be parking on private land or in a residential driveway. There are many options out there, just ask any RVer!
You can design your Tiny House RV for “off-grid” or “on-grid” parking. Your future parking location may depend on your choice of utilities. It’s a good idea to plan ahead and determine how flexible you’d like to be with parking and utility maintenance.
Ask yourself: Will I always have access to water and electricity? If you’d prefer to have off-grid electricity, you might consider designing your Tiny House RV with propane appliances to limit your electrical needs. If water will not always be available, you’ll need to estimate how large of a fresh water tank you will need. The same goes for your grey water and black water tanks.
Ask yourself: How hands on do I want to be with my utilities? Being off-grid might mean emptying your compost toilet, rotating your solar panels and filling your fresh water tank every week. If this does not appeal to you, perhaps a parking spot with full connections is more suitable to your needs.
Watch this video for a full explanation of parking and setting up a Tiny House RV, whether you are off-grid or on-grid:
If you are interested in the products used in this video, here are details (in order of appearance):
Step 1: Level Left & Right
– Andersen Levelers and Chocks: http://amzn.to/1GIm3l7
– Graduated Bubble Levels: http://amzn.to/1GImGLv

Step 2: Detach
– Andersen No-Sway No-Bounce Weight Distributions System: http://amzn.to/1ToLfSV
Step 3: Level Front & Back

Step 4: Stabilize
– Andersen Tough Pads: http://amzn.to/1R26gyX
– Milwaukee Drill: http://amzn.to/1GoIdHM
Step 5: Connect Grey Water
– 15 Gal Thin Grey Water Tank: http://amzn.to/1Bestbr
– 3′ Sewer Hose: http://amzn.to/1FXYVew
– 15′ Sewer Hose: http://amzn.to/1G9l098
– Sewer Blade Valve: http://amzn.to/1FXZ3L9
– Nature’s Head Toilet: http://amzn.to/1GoIJVZ

Step 6: Connect Electricity
– Marinco 30 Amp Inlet: http://amzn.to/1FY085w
– Marinco 30 Amp / 15 Amp Pigtail Adapter: http://amzn.to/1GIou7j
– Heavy Duty 15 Amp Extension Cord: http://amzn.to/1BiPkT1
– Goal Zero Yeti 1250 Solar Generator: http://amzn.to/1R29FO8
– Two 100W Renogy Solar Panels: http://amzn.to/1GoJBdo

Step 7: Connect Water
– 50′ Drinking Water Hose: http://amzn.to/1Beuch1
– Hose Caps: http://amzn.to/1SiZ3gz
– Water Inlet: http://amzn.to/1GoJJtg
– Stainless Steel Regulator: http://amzn.to/1GoJK0d
– Water Hose Valve: Home Depot
– Water Filter: http://amzn.to/1ToN9TK
– 46 Gal Water Tank: http://amzn.to/1BeuHY8
– Water Pump: http://amzn.to/1eiHqyR
Step 8: Exterior Set Up
– Receiver Lock: http://amzn.to/1ToNpSB

Step 9: Interior Set Up
– Curtain Tension Rods: http://amzn.to/1BiQiyp
– Propane Cooktop: http://amzn.to/1GoKi6j
– Low Flow Showerhead: http://amzn.to/1BiQv4D
– Shower Diverter: http://amzn.to/1Bevicp
– Chrome Shower Hose: http://amzn.to/1G9oUio
– Chrome Shower Bracket: http://amzn.to/1LcLLhk
– Dometic 3 Way Fridge: http://amzn.to/1eiIJ0P
– Sliding Storage: http://amzn.to/1BevAA4
– Ottomans (modified): http://amzn.to/1BevKY7
Step 10: Relax!
Few question for Tumbleweed Houses and/or Tiny House owners:
I have search the Net for some of these answers but have yet to find much except RV parks and campgrounds of there accommodations.
. I’ve seen many a different caravans from the early 1950’s through the mid 1980’s and most were not welcomed due to the classic Gypsy stigma. In these modern times, barring the classic Gypsy lifestyle which includes attitudes, vehicle and clothing colors, music, etc., has this stigma changed? If so how well are (T.H.) Tiny House owners welcomed throughout the 48 State USA? Is there a listing of T.H. parks or lots with full hookups? Are there locations for the day/week parkers other than Walmarts and truck stops? Do foundation home owners who live near T.H. parks offer services to T.H. owners in ways of elec. & water?
. I’m currently near finished with my Micro House/RV plans, yes, it’s even smaller than a normal Tiny House. When it’s on the road, I should have easier places for its accommodations (key word SHOULD), but of course there are limits to what local folks will put up with.
. Lastly, are professional T.H. builders working with one another, in respect to my questions, or are they totally private and don’t care what the others are doing?
. THANKS for the chance to ask and hopfully these answers will help other T.H. wannabees.
FM (reverse: moc(dot)asu(a)mvf)
My question last week wasn’t proper?
Hi FM, Sorry we didn’t see your comment. The tiny house movement still has struggles to find legal parking, but with one step at a time things are slowly changing around the country. Here is an article we posted recently about the Rails to Trails conservation program and how one tiny house village has found itself working in partnership with their county. https://www.tumbleweedhouses.com/tiny-house-lifestyle/simplify-tiny-homes-finds-promising-spot/