
More than 3 hours of video instruction
Start with the Trailer
Looking to build your own tiny house but not sure where to start? Join Meg and Art from Tumbleweed Tiny House Company as they discuss one of the most essential building components: the trailer. In this informative video, they share their expert knowledge on what to look for when choosing a trailer, including the flat surface needed for building, appropriate axles for the weight of the house, and the importance of deck height. They also warn against the pitfalls of buying a dovetail trailer and offer tips on how to prepare a used trailer for building.
Floor Framing
A tiny home trailer is a unique foundation that requires a different approach compared to traditional home building. Unlike conventional homes where the floor joists span a solid foundation, a tiny home trailer demands special attention to ensure stability, insulation, and proper support. This 5-step process covers everything you need to create the perfect subfloor: from preparing the trailer and cutting insulation to laying down the subfloor, adding fur material for extra width, securing everything in place, and ensuring the floor is perfectly square. These steps are designed to help you build a strong, durable base for your tiny home.
Wall Framing
We’re moving on to step three in our tiny house-building journey – wall framing. And this is where things start to get real. We’re talking about the bones of your house, the structure that holds everything together. And it’s important to get it right.
When framing the walls, it’s critical to consider the window and door placement. This will not only affect the look of your tiny house but also the natural light and ventilation. And don’t forget about the ceiling, it’s just as important as the walls.
And remember, when it comes to framing, measure twice, and cut once.
Loft & Roof
Chapter four in building our DIY tiny house on wheels covers the loft and roof. The loft is where you can get creative and add extra storage or unique sleeping area that shows off your flair.
And when it comes to roofing, there are a lot of options to choose from. From traditional shingles to metal roofing, it’s all about finding the right fit for your tiny house and your budget. Get the advice needed to choose the best options for your tiny home.
Windows & Doors
Before purchasing your windows, make sure to only buy tempered glass. This makes it ideal for a house that travels on the road. Also, take the same precaution for the doors you pick as well. Security and durability should guide your choices. That doesn’t mean taste and style should go out the window.
Depending on the windows or doors you choose, as well as their positions, the installation might be different. For example, skylights and bay windows have different processes. Also learn about flashing, siding (for windows), leveling, and insulation. Finally, you want to make sure that your installation is a neat process. Tidy up the edges, trim, and drill efficiently so the result not only adds to the practicality but also the aesthetics of your home.
Electrical
When you plan the electrical layout, consider the future. Will you want to add more electrical features down the line? You might want to consider hiring a professional electrician to do this, depending on your comfort level with electrical work. But if you’re feeling confident, you can tackle it yourself. Just make sure to follow all the safety guidelines and instructions.
And don’t forget about the main power source for your DIY tiny house. You’ll need to make sure you have a reliable power source that’s safe and up to code. This could be a generator, solar panels, or hooking up to the grid.
Plumbing
Plumbing in a DIY tiny house isn’t as complicated as you might think. With the right guidance, anyone can tackle it.
Think about where you want your sinks, toilets, and shower to be. And don’t forget about the water supply and drain lines. Make sure they’re in convenient locations that make sense for your tiny house floor plan. You might want to consider hiring a professional plumber to do this, depending on your comfort level with plumbing work. But if you’re feeling confident, you can tackle it yourself. Just make sure to follow all the safety guidelines and instructions.
And don’t forget about the main water source for your tiny house. You’ll need to make sure you have a reliable water source that’s safe and up to code. This could be a well, a water storage tank, or hooking up to the municipal water supply.
Insulation
Insulation maintains your home’s temperature comfortable, and when done properly helps our environment.
Choose the right insulation type and R-value for your tiny house. R-value is the measure of how well insulation resists heat flow, the higher the R-value, the better the insulation is. There are different types of insulation like fiberglass, cellulose, and spray foam insulation each with its own R-value and insulating properties. So make sure you do your research and choose the one that best suits your needs and budget. Once the insulation is in place, we teach you quick steps to make sure there are no gaps or leaks that could let in drafts and affect the insulation’s effectiveness.
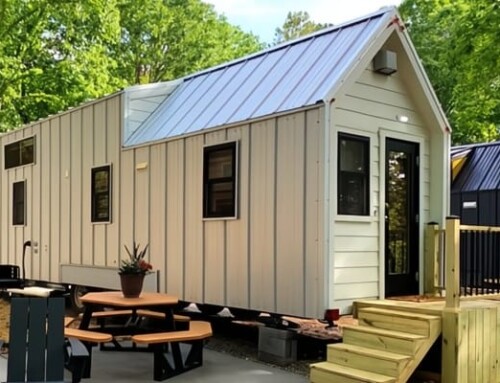
Siding & Trim
Siding and trim help define your style and protect your tiny home from the elements. There are so many options, but only a few that work for a tiny house on wheels. Learn about your siding options, and how to install it.
Once your siding is in place, you’ll trim each window, door and corner – adding an extra layer of protection against the elements.
Fit & Finish
We are now at the final touch that brings everything together and make your tiny house feel like a home—-fits and finishes.
Make sure everything is functional and secure. This means making sure that all the electrical, plumbing and mechanical systems are working properly. You don’t want any surprises after you’ve finished building your tiny house. Once everything is functional and secure, it’s time to add the finishing touches. This includes paint, flooring, and cabinetry. You want to make sure that the tiny house looks good and feels like a home. You can choose to paint the walls, and choose the flooring and cabinetry that best suits your taste and budget.
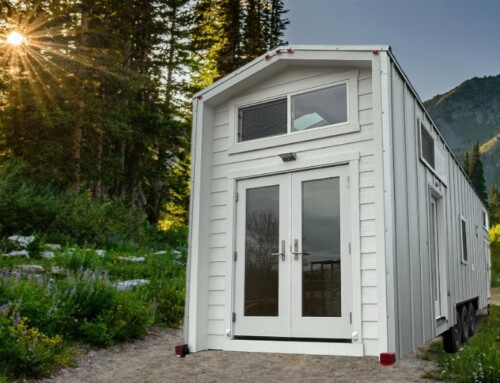
Tour the Finished Cypress
The Tumbleweed Cypress is now complete. As we take a tour of this finished house, I want to remind you all to maintain it properly. Regularly check for any leaks, drafts, or any other potential issues.
That said, no tiny home is truly complete until you’ve properly named it. Discover what other’s have named their tiny homes.
Still uncertain? See other’s who built their own.


Leave A Comment